How to Properly Take Stunning Pictures of the Northern Lights in 2025
Photographing the Northern Lights, or aurora borealis, is an exhilarating experience that requires a mix of planning, patience, and skill. In this guide, we will explore comprehensive techniques and tips on how to photograph northern lights that will help you capture stunning images of this natural phenomenon. From understanding the best camera settings for auroras to knowing ideal locations for aurora photography, here’s everything you need to know to seize that magical moment in 2025.
Understanding Aurora Borealis Photography
The first step to mastering photographing the aurora borealis is to understand how this spectacular display occurs. The Northern Lights are caused by charged particles from the sun colliding with Earth’s magnetic field, and they tend to appear in certain geographic locations. To successfully capture these lights, knowledge about the best times to see northern lights and weather conditions is paramount.
Choosing the Right Location
Finding the perfect spot for capturing auroras at night is essential. The best locations for aurora photography typically lie within the auroral oval, which crosses parts of Canada, Alaska, Greenland, and northern Europe. Areas away from city lights are also ideal as light pollution and northern lights can diminish the visibility of the auroras. Researching aurora forecast websites and checking local weather conditions will help increase your chance of viewing the lights.
Understanding Weather Conditions
Weather plays a critical role in photographing auroras. Clear, dark skies significantly enhance your ability to see and shoot the Northern Lights. Prior to heading out, consult weather forecasts, and utilize smartphone apps for aurora alerts, which can notify you of peaks in auroral activity. Planning your outing during winter photography northern lights season often coincides with the clearest and darkest nights, enhancing your shooting experience.
Best Camera Settings for Northern Lights Photography
Getting the best camera settings for auroras requires an understanding of your camera. Each camera model may vary, but general settings typically include a wide aperture, a low ISO, and a long exposure. Experimenting with these settings can help you find the optimum configuration for your specific camera.
Aperture and ISO Settings
A **wide aperture** (f/2.8 or lower) allows more light to hit the sensor, which is crucial when taking nighttime photos. Combined with a low ISO (800-3200), you can minimize noise in your images while maximizing clarity in your Northern Lights shots. Balancing these settings is a key step in northern lights exposure settings.
Long Exposure Techniques
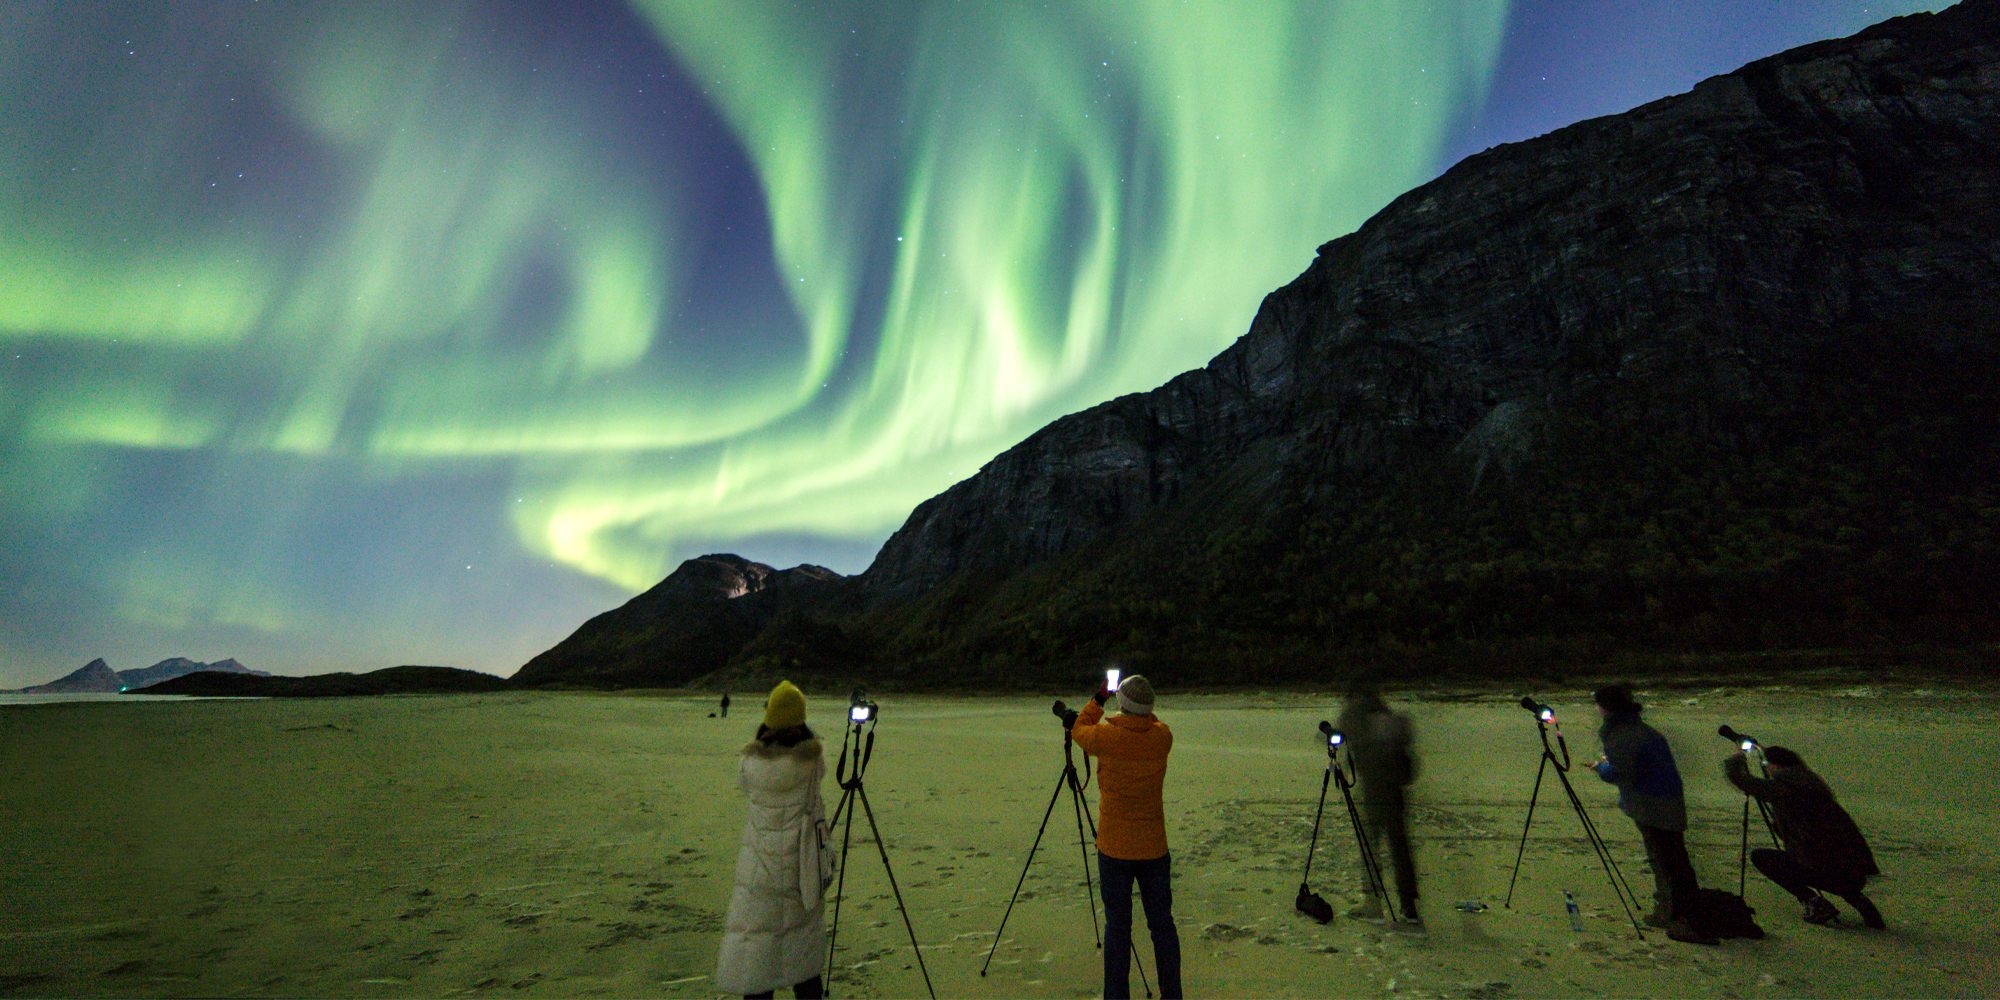
Long exposure photography tips are an essential part when capturing the vibrant colors of auroras. Depending on the brightness of the northern lights, your exposure time can range from 5 to 30 seconds. Using a tripod will help stabilize your camera, allowing you to take clear, sharp images without blurriness caused by handheld movement.
Using the Right Equipment
When it comes to aurora photography equipment, a few essential tools can enhance your shooting experience. It’s important to have the right camera body, lenses, and accessories prepared for the unpredictable nature of this nighttime phenomenon.
Lenses for Aurora Photography
The choice of best lenses for northern lights photography plays a significant role in how your images turn out. A prime lens with a wide aperture (like a 14mm or 24mm f/2.8) is ideal for capturing more light and detail while minimizing distortion. Such lenses excel in low-light conditions, making them an excellent choice for landscape shots that include the Northern Lights.
Accessories for Night Photography
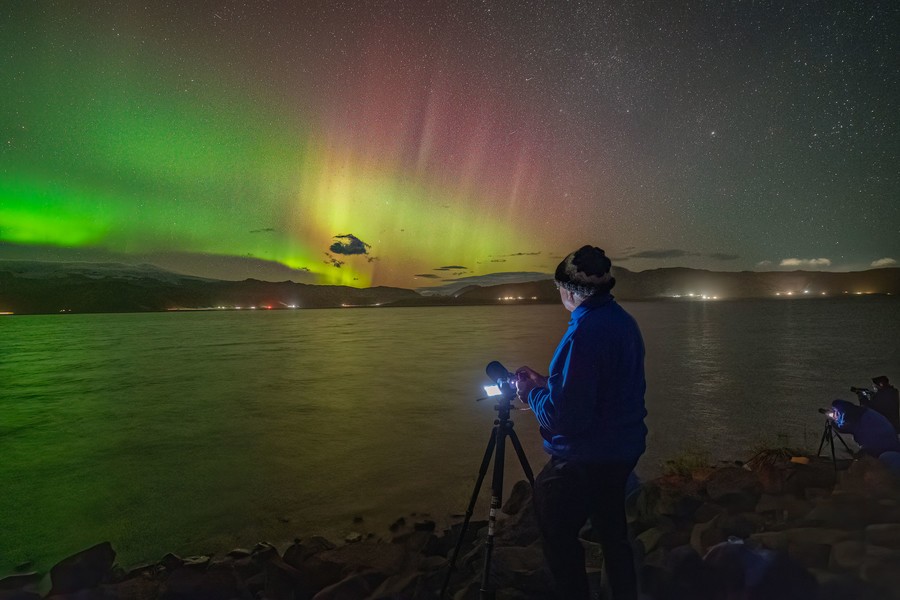
Using tripods for aurora photography is non-negotiable. Without a tripod, it becomes challenging to keep your camera still during long exposure shots. Additional gear such as remote shutter releases can prevent camera shake and lead to clearer photographs, alongside filters if you’re looking to adjust light settings.
Editing Your Northern Lights Photos
The journey doesn’t end with the click of the shutter; post-processing is crucial for enhancing your northern lights images. Understanding basic digital editing techniques can truly elevate your photography from good to stunning.
Post-Processing Techniques
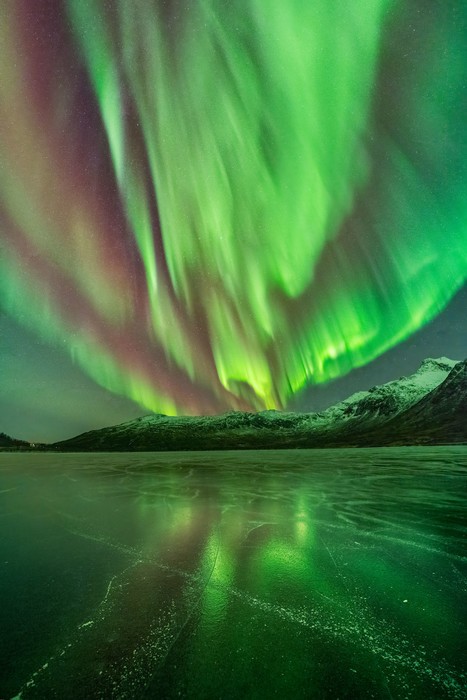
Editing involves adjusting various settings to enhance the final image. The most common adjustments for editing northern lights photos include brightness, contrast, and enhancing colors. Software like Adobe Lightroom or Photoshop can offer powerful tools for this process, allowing you to bring out the vibrant green and purple hues of the auroras.
Showcasing Your Work
After fine-tuning your compositions, consider creating a stunning travel portfolio of your photographing auroras with friends or solo adventures. Sharing your work through social media platforms or photography communities not only showcases your skills but may inspire fellow photographers to venture on their planning northern lights trips.
FAQ
1. What is the best time for auroras?
The best time to view and photograph the auroras is typically between late September and early April, with peak activity occurring around the equinoxes in March and September. These months often provide clear night skies ideal for capturing stunning photos.
2. How do I choose the right camera for northern lights photography?
Choosing the right camera for photographing the aurora borealis involves selecting a model that performs well in low-light conditions and has settings for manual control. DSLRs and mirrorless cameras are excellent options, as they allow adjustment of ISO, shutter speed, and aperture.
3. Can I photograph auroras using a smartphone?
Yes, you can capture auroras with a smartphone. However, ensure the camera has manual settings, a wide lens, and support for long exposure. Use a stabilizer or tripod for clarity, and consider editing apps to improve final images.
4. What are some common mistakes in aurora photography?
Some common mistakes include not using a tripod, high ISO settings leading to noisy images, and neglecting to prepare for changing weather conditions. It’s crucial to test and adapt settings on location to achieve the best results.
5. How do I prepare for outdoor photography in cold temperatures?
Preparing for outdoor photography in cold temperatures requires wearing appropriate clothing, such as thermal layers and insulated boots. Pack extra batteries as cold weather can drain them quickly and familiarize yourself with your equipment prior to your journey.
6. What accessories do I need for northern lights photography?
Key accessories for northern lights photography include a sturdy tripod, remote shutter release, extra batteries, and appropriate clothing. Additionally, filters may enhance your photos, and a wide-angle lens will capture more of the scene including the auroras.
7. Where can I find reliable aurora forecasts?
Reliable aurora forecasts can be found on dedicated websites and apps, which provide real-time updates and predictions based on solar activity. These resources help increase your chances of witnessing the auroras during your trips.